Making Travel Planning a Breeze with Capacities
We all know that familiar mix of excitement and overwhelm when planning a new adventure. There are many details to consider and different options to choose from. Be it the right hotel, or mapping out daily activities, travel planning can feel like juggling dozens of details at once.
Yet here’s the interesting part: whether you’re heading to Paris or Patagonia, many of the planning steps remain surprisingly similar, and many tasks remain the same. This is where a well-structured travel planner becomes your best friend!
Think of it as your command center - a single place that transforms scattered ideas into organized plans. Instead of drowning in browser tabs and sticky notes, you’ll have a clear system that helps you focus on what matters: looking forward to your adventure.
Sure, setting up your travel planning system takes a bit of initial effort. But here’s the beauty of it: you only need to do this once. After that, you’ll have a reliable framework for every future trip, saving you a lot of time and avoiding reinventing the wheel each time you start planning a new adventure.
So, let’s build this travel planner together! As always, we are just exploring ways to do that and build a foundation you can easily adapt to your needs and make it a personalized experience.
Here’s what we’ll work with:
- Locations - Your destinations, from cities to islands or specific villages
- Points of Interest - Everything you want to see and experience
- Trips - Your actual journeys, with dates and logistics
- People - Travel companions and contacts
And finally, a template for your trip object type that brings structure and even more reusability.
Prerequisites
Let’s create some Object Types
In our travel planner, we’ll deal with different types of notes like locations or people. As those differ from each other (locations are clearly not the same as people 😅) we create different object types with their own properties.
- “Locations” or “Places”
- Properties: country (single-select, tags, fixed set), cover image
- Collections: Islands, cities, villages
- “Points of Interest” (POIs)
- Properties: location (single-select, connected to locations), rating (single-select, tags, fixed set), Google Maps (text), Website (text)
- Collections: restaurants, accommodation, culture, etc.
- “Trips”
- Properties: date range (date time, “disallowed” for time, and “required” for range), locations (multi-select to “locations”), status (single-select, tags, fixed set), People involved (text) Thoughts about whether or not to choose a text property over a multi-select for people: In a text property, you can add people you do not want to create a people object for, combined with inline links to people already part of your people object type and notes about them. A multi-select to the people object type lets you select options from existing objects. Both approaches have their advantages and disadvantages, I personally prefer the text property.
or
- You use your existing object type “Projects”, as one could argue trips are, and add a collection for “trips”.
Creating a Template
Now that we’ve set up our essential objects, let’s create a reusable template. Think of it as your personal travel planning blueprint, a place to bring it all together for every trip in the future.
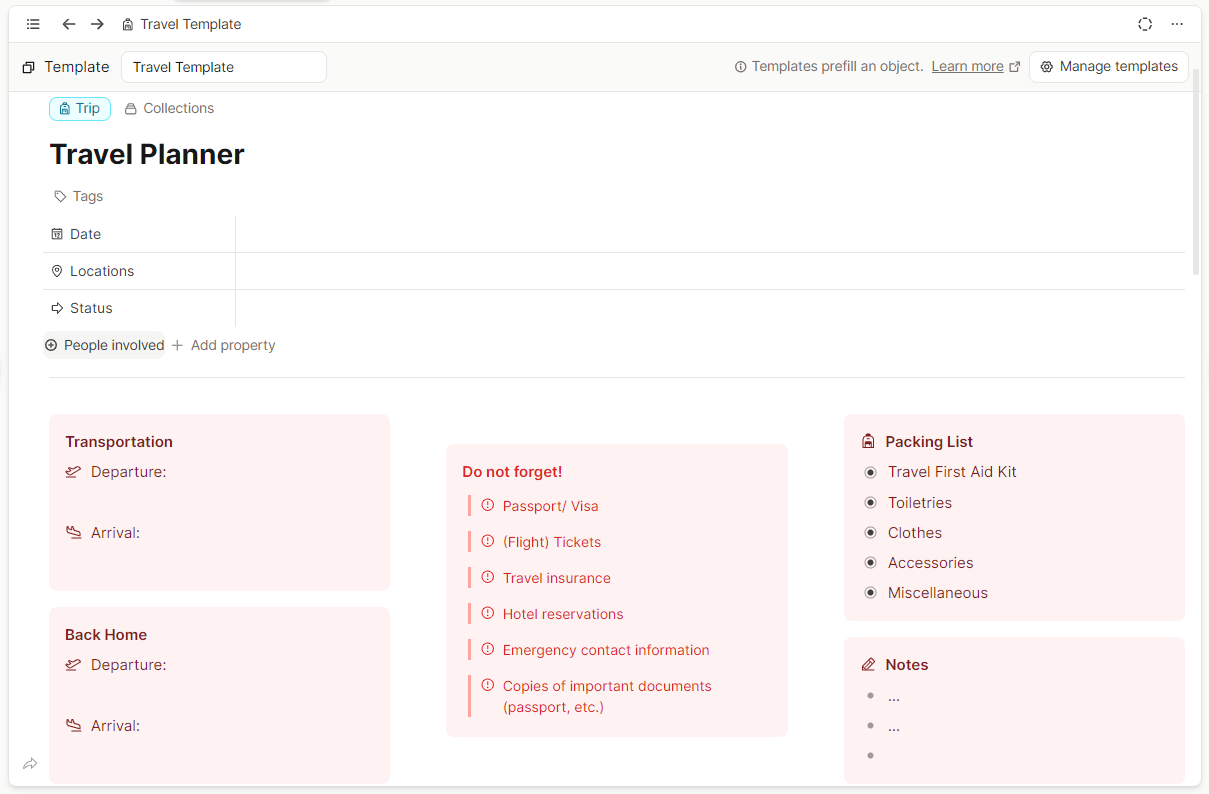
Let’s fill the template with content, whether you created a new object type for trips or added a collection in your existing project object type. Use headings and toggles, groupings, background colors, whatever you need to have everything together.
The top section of your template should feature all the crucial information:
- Departure date and time
- Arrival details
- Return journey information
- Important document checklist
- And, as we all know, the nagging feeling that we’ve forgotten something, the template needs a built-in packing list with checkboxes that automatically generates every time you start planning a new trip.
If you’re a Believer or have a pro subscription, let the AI assistant help you create your packing list! Simply write a prompt followed by /ask AI. For example: “Packing List with checkboxes for two weeks in Portugal in November with only hand luggage.”
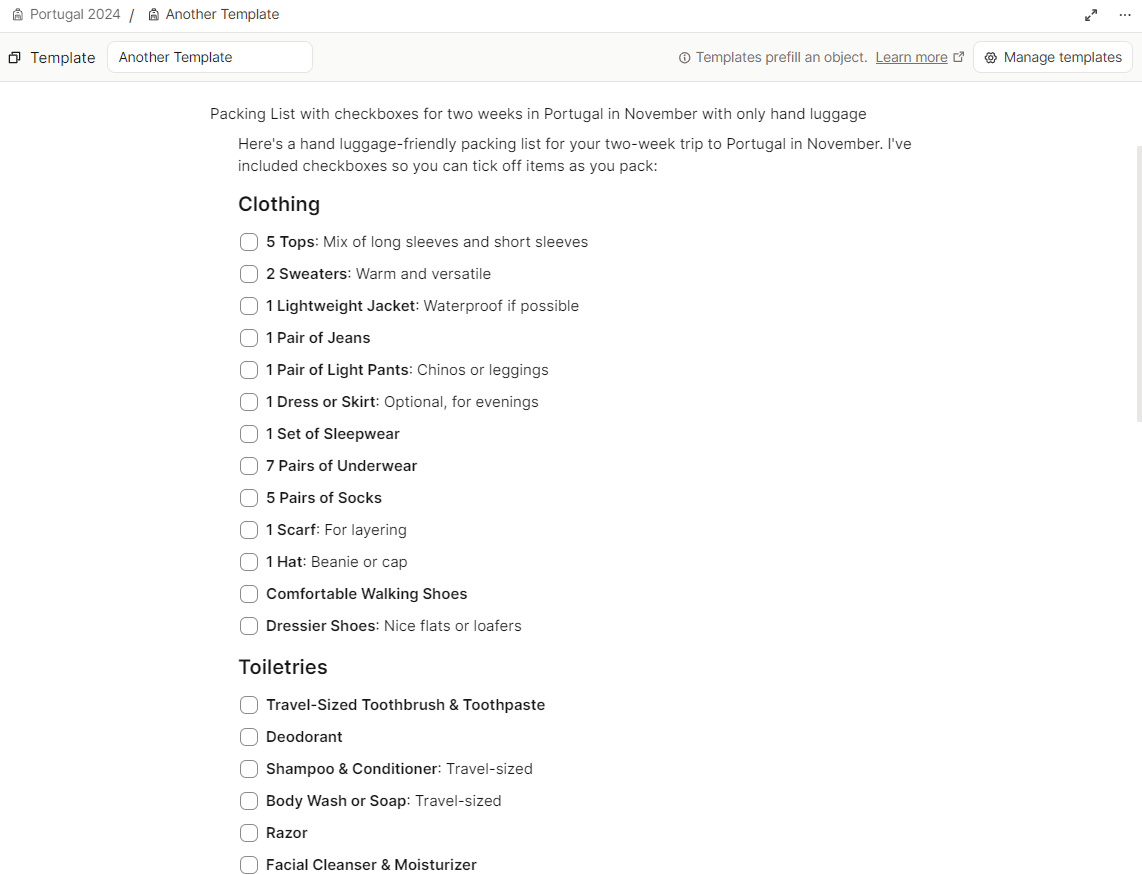 You can customize the list to your needs. However, Ai is not a must, the following template was created without using AI. It just may help you think of items you might have forgotten!
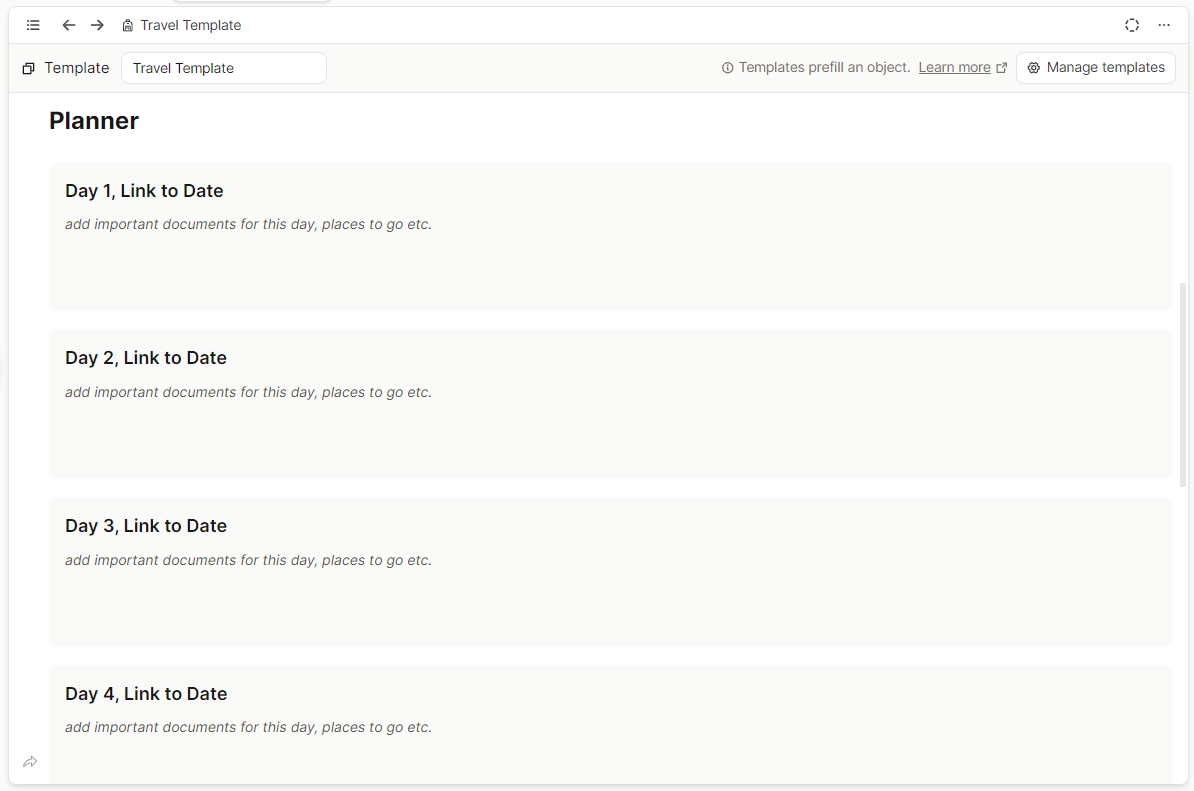
Below the essential information, we create a section for detailed planning. Make it your own by using:
- Headings and toggles for easy navigation
- Group sections and colors for better organization
Each colored block in the template is a set of grouped blocks. Just select a few blocks and turn them into a group with Ctrl G (Windows) or Cmd G (Mac). Arranging the content to your liking is more straightforward this way. Also, it helps you see a group’s whole content in the backlinks section, as you will see later. Also the “Link to Date” headings will make more sense later on.
I know this was a lot of preparation, but by setting up this template once, you’re creating a reliable foundation for all your future travel planning. Each new trip becomes an opportunity to refine and perfect your system rather than starting from scratch. Now, let’s start planning!
Phase 1: Research
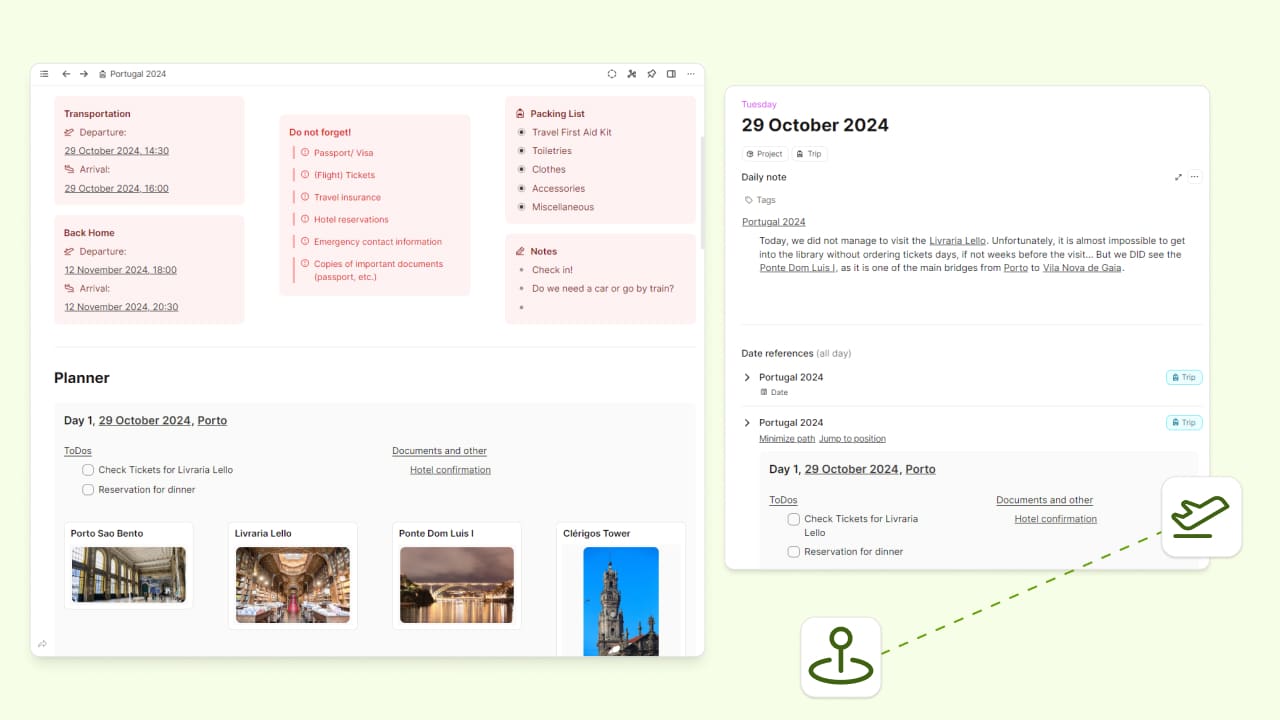
Let’s walk through the process using an example: planning a trip to Porto, Portugal, from October to November 2024. First, we create a new trip object called “Portugal 2024” - our digital home base for everything related to the trip.
Every trip usually starts with some exploration and research about the destination.
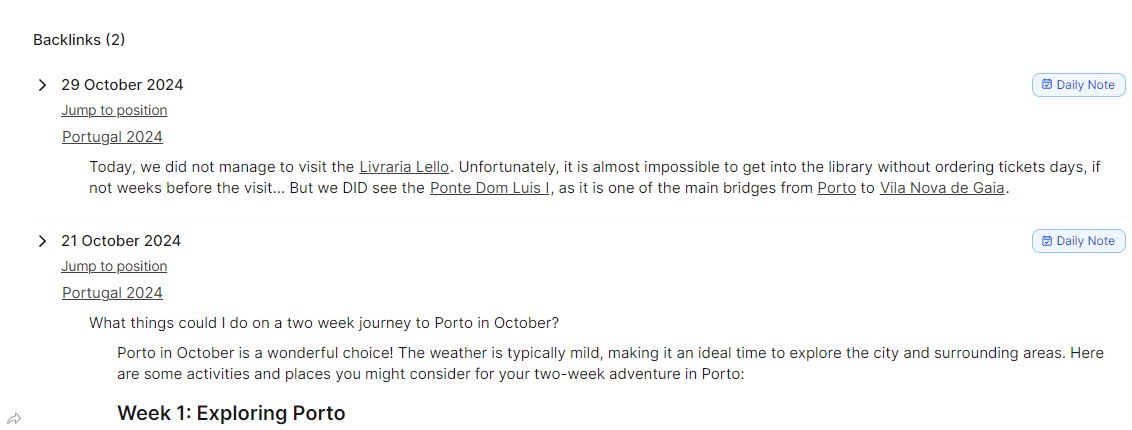
I love using daily notes as my digital scratchpad during this phase. Think of them as your brainstorming canvas - no need to worry about perfect organization yet! I simply link to “Portugal 2024” and jot down everything that catches my eye indented underneath. Thanks to backlinks, nothing gets lost.
If it feels better for you, you could also add a section in “Portugal 2024” to do the research.
Whether using Capacities Pro’s built-in AI to ask questions like “What can I do during two weeks in Porto in October?” or diving into traditional Google searches, the key is capturing interesting and exciting information you find.
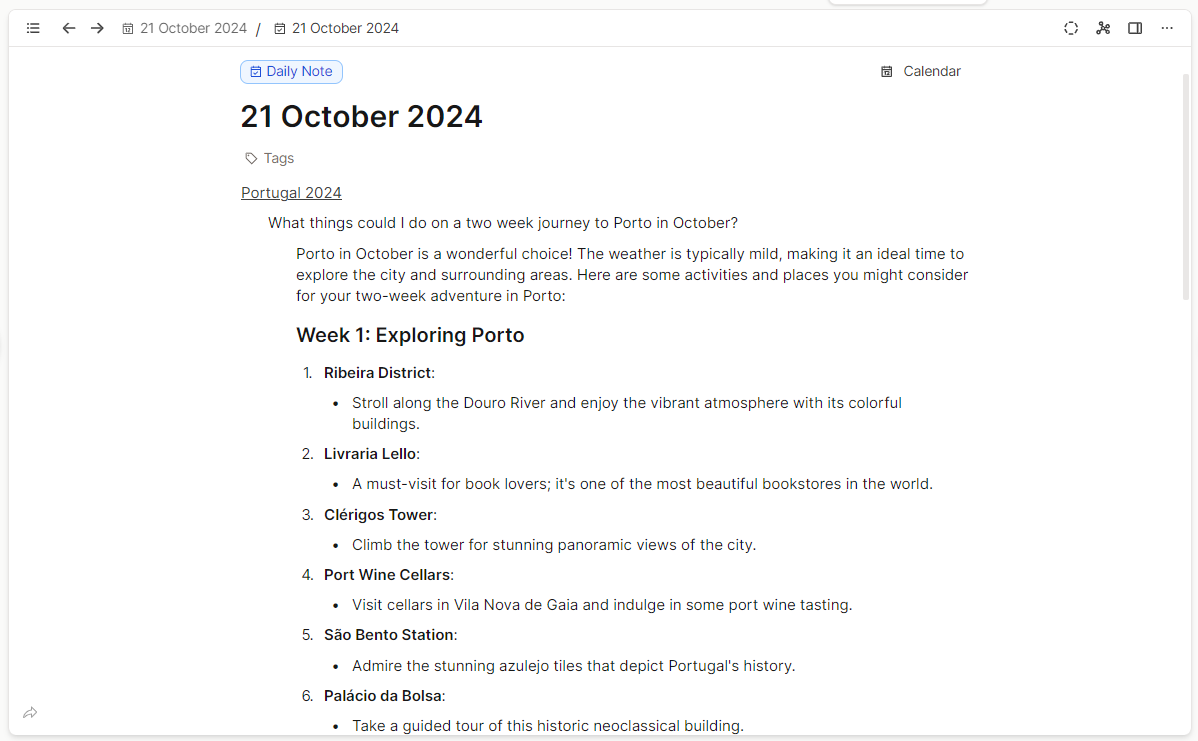
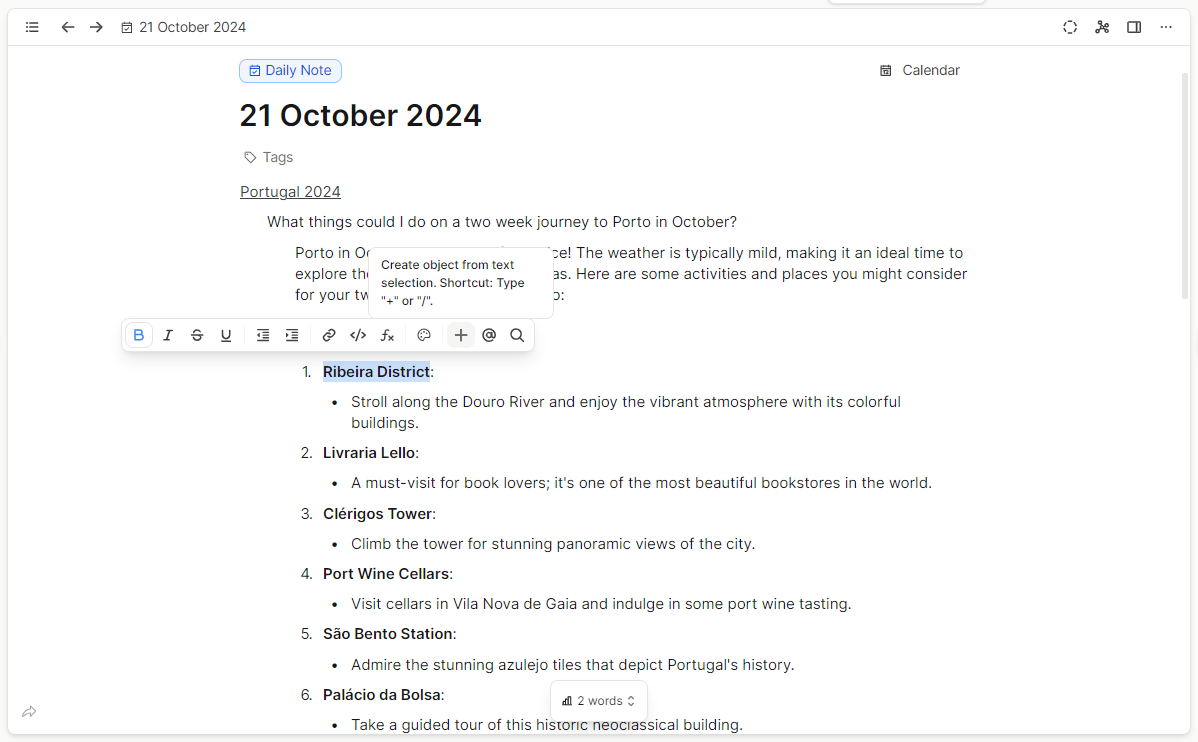
As you research, certain cities, attractions, or experiences will spark your interest. Now, transform these discoveries into dedicated objects in Capacities. Each interesting place, restaurant, or activity becomes its own entry.
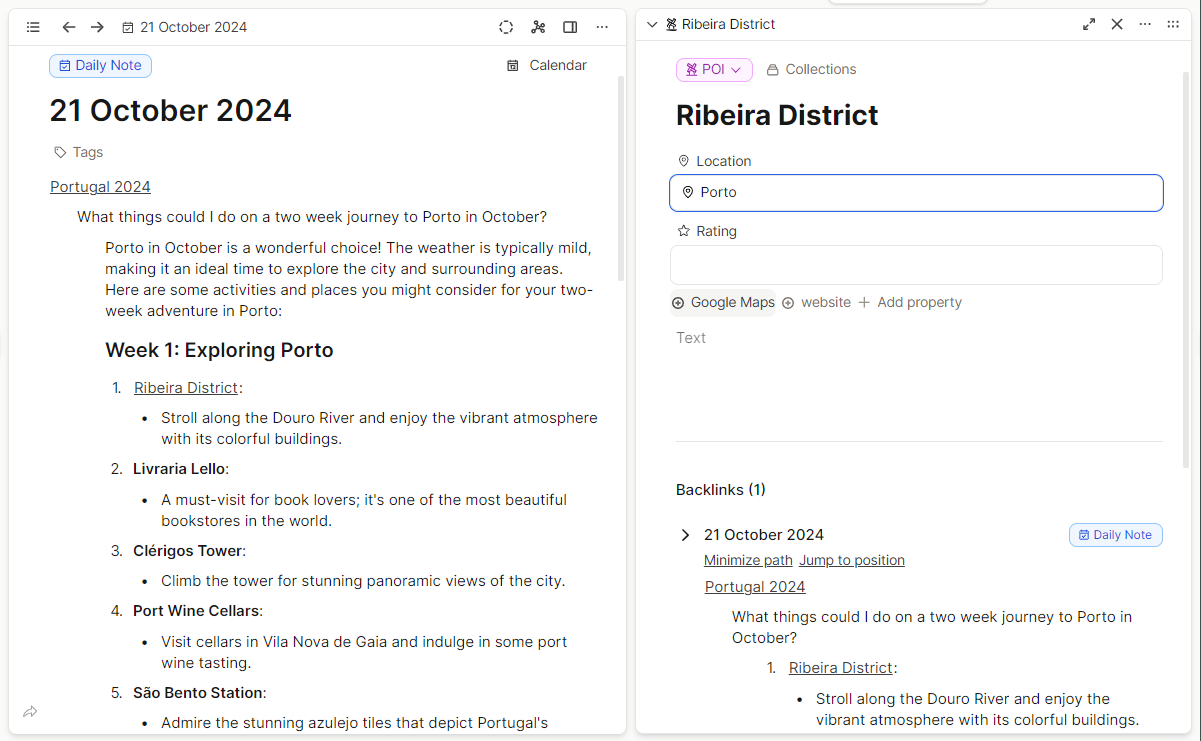
Open the created objects in the right sidebar (shift-click) and complete with properties like location, links to Google Maps, etc.
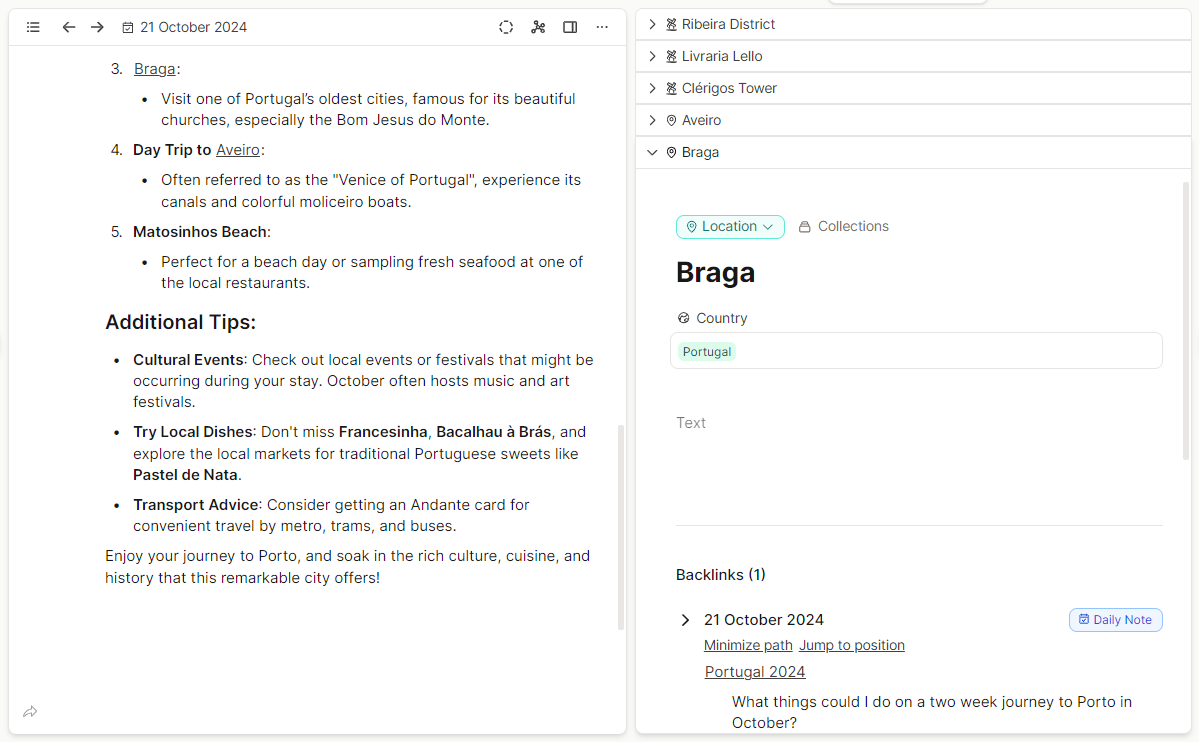
This way, we can add more places to visit. And do not worry about creating too many places! Some might not make it into this trip’s itinerary, but they’ll be waiting in Capacities until next time.
Phase 2: Plan the Trip!
Now comes the fun part - turning your research into a real plan! Open up your “Portugal 2024” object and let’s get organized and build a daily schedule!
Again, the right sidebar comes in handy: While working on your main trip object, keep relevant city information (like Porto) open in your sidebar. This gives you instant access to all those places you discovered and gathered during research.
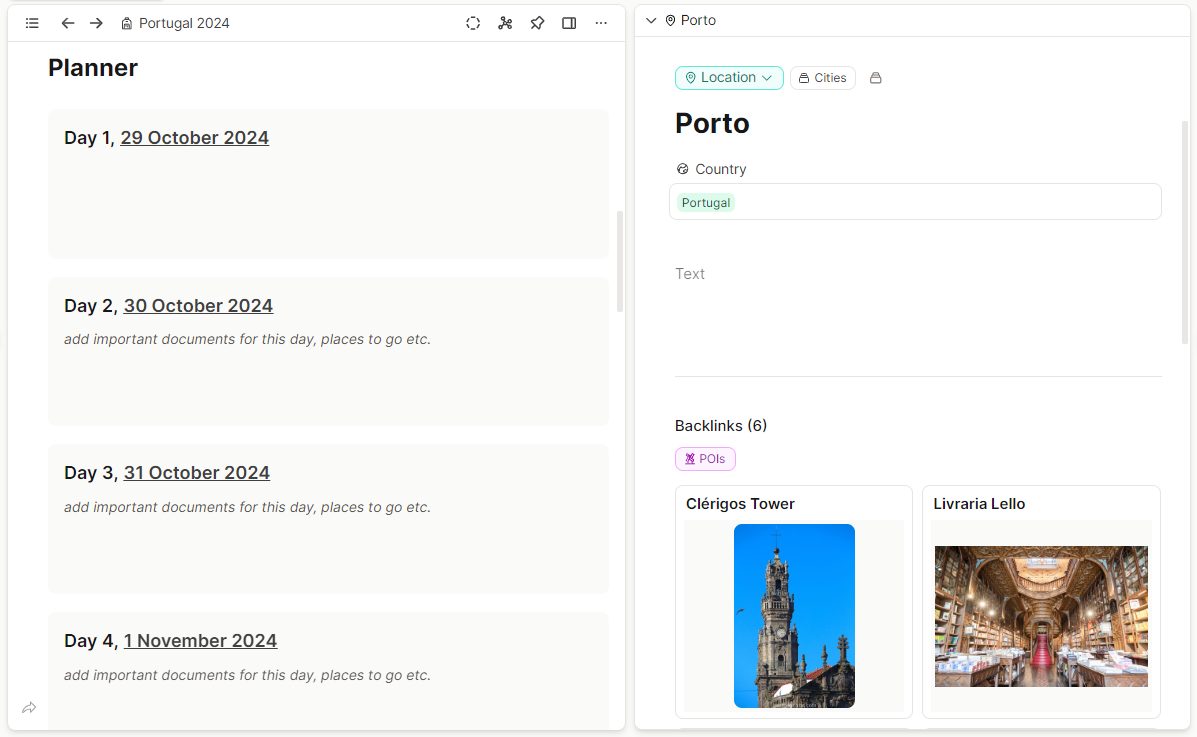
Start mapping out your days by:
- Linking to specific calendar dates in the headings
- Adding your must-see attractions and places in small card-view
- Grouping activities by location to minimize travel time
- Including important documents like tickets and reservations
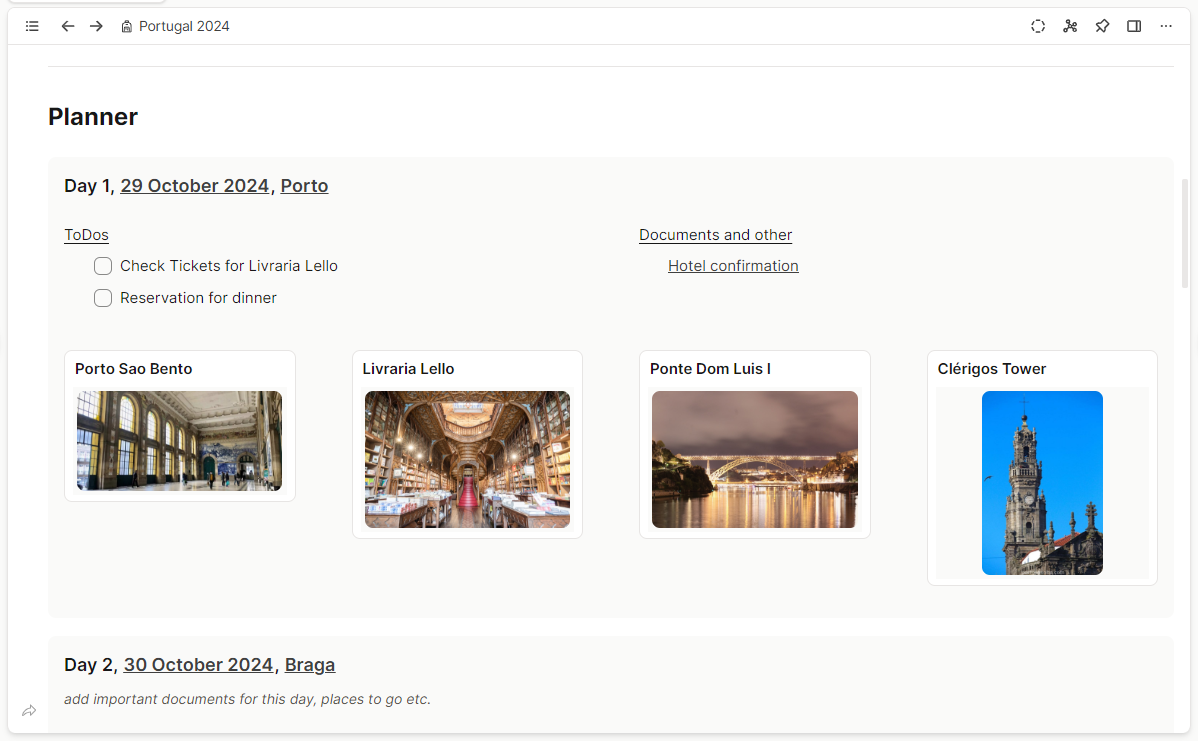
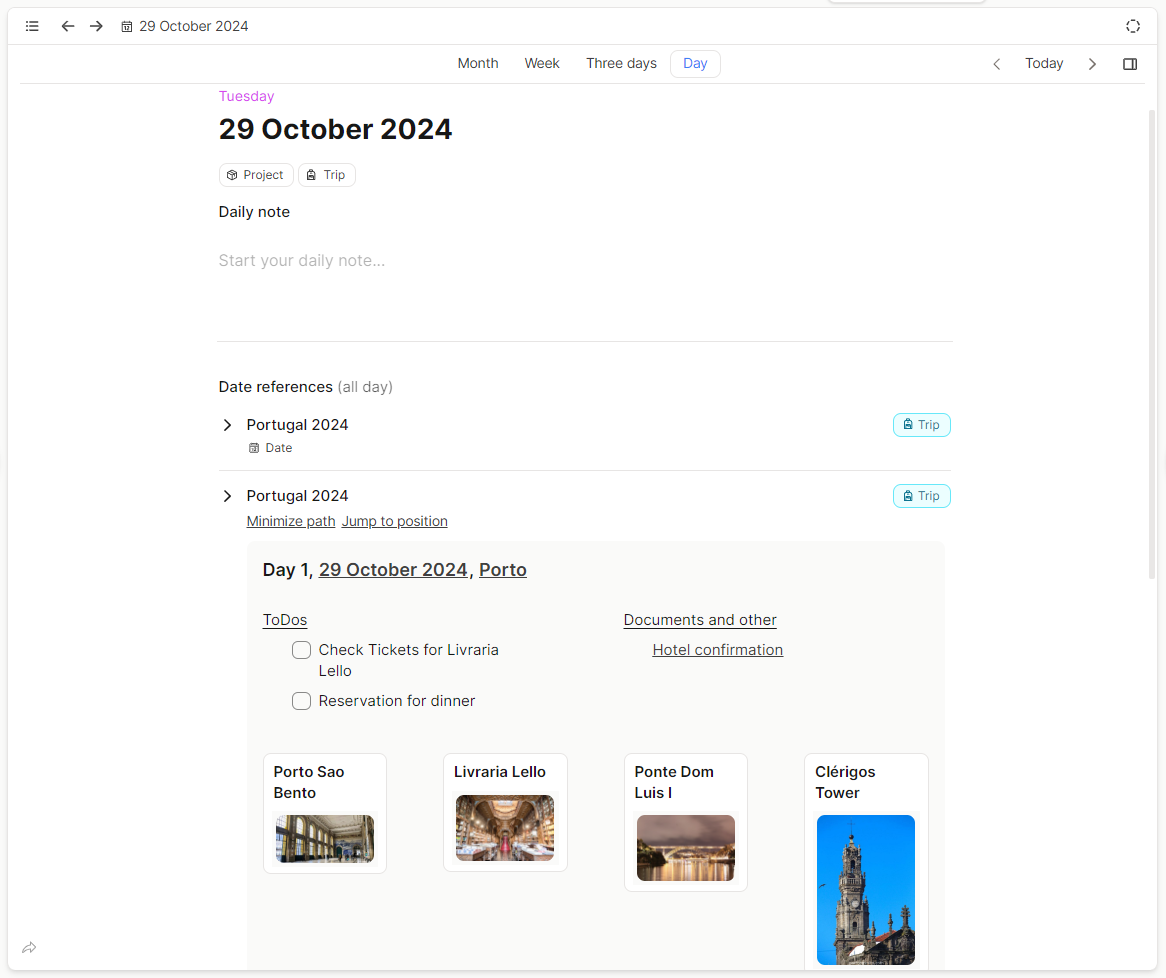
Phase 3: During your Journey
Now, this is where all your planning pays off! Each morning of your trip, your calendar will show everything you need for the day - no more searching through multiple apps or documents through the preparation before. Just look at the “Date references” section in the daily note; you’ll have everything at your fingertips exactly when needed.
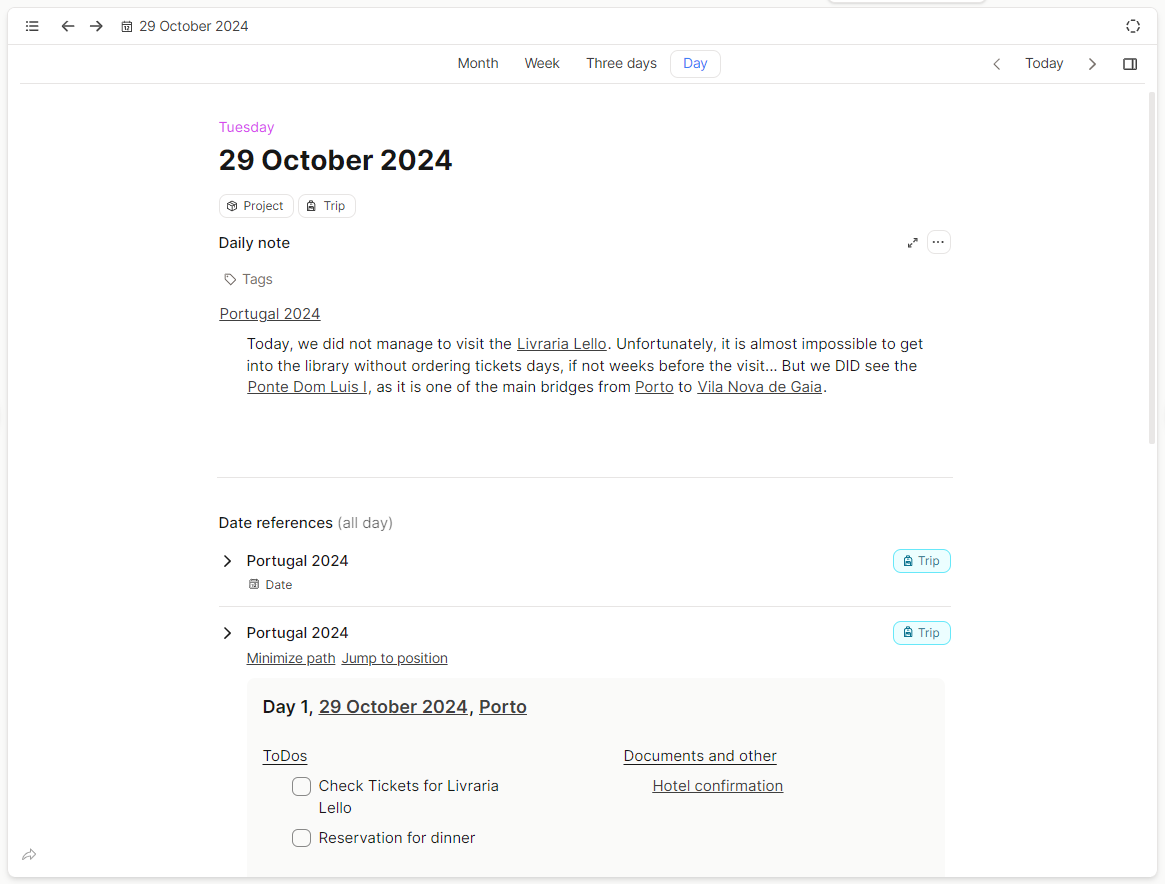
Also, use your daily notes to write down your experiences. By linking these entries to your trip object and places visited, you effortlessly create a rich travel diary. Every memory, photo, and impression becomes part of your trip’s story, automatically appearing in your “Portugal 2024” backlinks.
Remember, this is just a framework - feel free to adapt it to your style! Add sections, remove others, or completely reorganize things. The best planning system is the one that works for you.

I hope you enjoyed the read and found inspiration to try it out for yourself!
See you next time 🤓,
Anna
Read and watch more:
Dates and daily notes | Capacities Docs
Take your backlinks to the next level with indentation
AI Assistant | Capacities Docs
How to use the editor in Capacities - YouTube
Customizing your Object Types - YouTube