Daily Tracking in a Table
If you want an easy way to track your sleep, workouts, mood, and more (and do some calculations using the Capacities Pro in-table formulas feature), a tracking system using tables comes in handy!
Creating Your Monthly Tracker Template
Let’s create a template for monthly tracking in your table object type.
Add columns and titles for everything you want to track. For example:
- Sleep (hours)
- Workout (duration in minutes)
- Energy (0-5 scale)
- Mood (0-5 scale)
- Symptoms (text)
- Highlights (text)
Making it functional (and pretty)
Add titles for each column depending on what you want to track, use formatting, colors, etc.
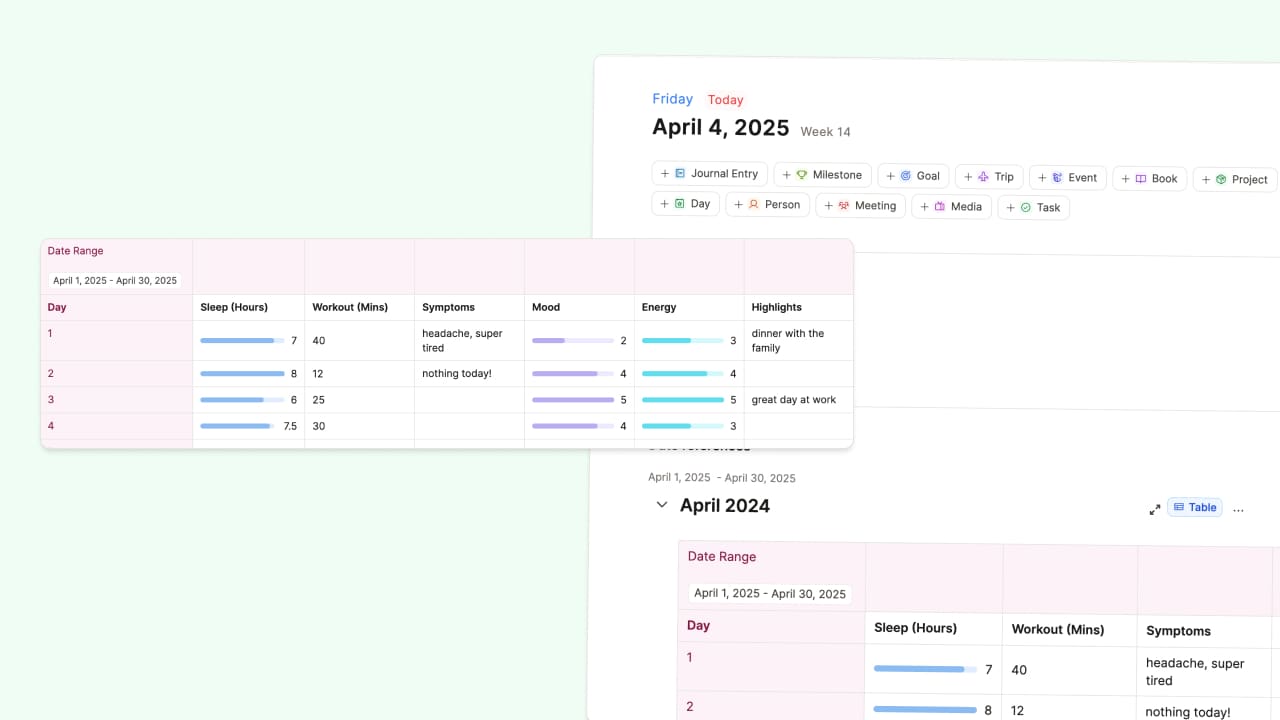
Let’s format each column to make the data more meaningful and visually appealing. It would be great if we could see some of those numbers as progress bars. Something like that:
So, let’s do it 🙂
Sleep Tracking
- Format as a progress bar
- Set maximum to 8 hours (representing ideal sleep)
- Anything above 8 will show as a full bar
- Quick visual feedback on your sleep patterns!
Workout Duration
- Simple number format
- We’ll keep it straightforward since we just want to track time spent exercising
Energy & Mood
- Progress bars with 5 steps (0-5 scale)
- Perfect for quick visual feedback on your daily state
- Helps spot patterns over time
Symptoms & Highlights
- Keep as text fields
- Great for qualitative data and personal notes
Adding Monthly Statistics with Capacities Pro
Pro subscribers can add formulas for simple calculations to your tables. So let’s add a summary row at the bottom to get insights:
- Sleep: Average (How much you typically sleep)
- Workout: Sum (Total hours exercised)
- Mood & Energy: Median (Your typical state that month)
Don’t worry if you see “Value” warnings when the table is empty - they’ll disappear once you start adding data!
Finally, let’s format the last row with centered numerical values for a clean presentation.
Applying the template and using Date Ranges
Now, we create a new table, apply the template, and add a date range.
Here’s where it gets really cool, and the magic happens:
Because of the added date range, the table automatically connects to every daily note in that month!
You can now access and update your tracking directly from your daily notes. Use the toggle in the Date references to fill in data without leaving your daily page.
If you need a broader view, just open the tracker in a new tab.
After some time, you can review your entries, see trends, spot patterns, and even export to CSV for further analysis. 🤓
Do you want to explore other ways to log your days? Check out Custom Journal Object Types or Daily Notes for Journaling.
📚 Read more
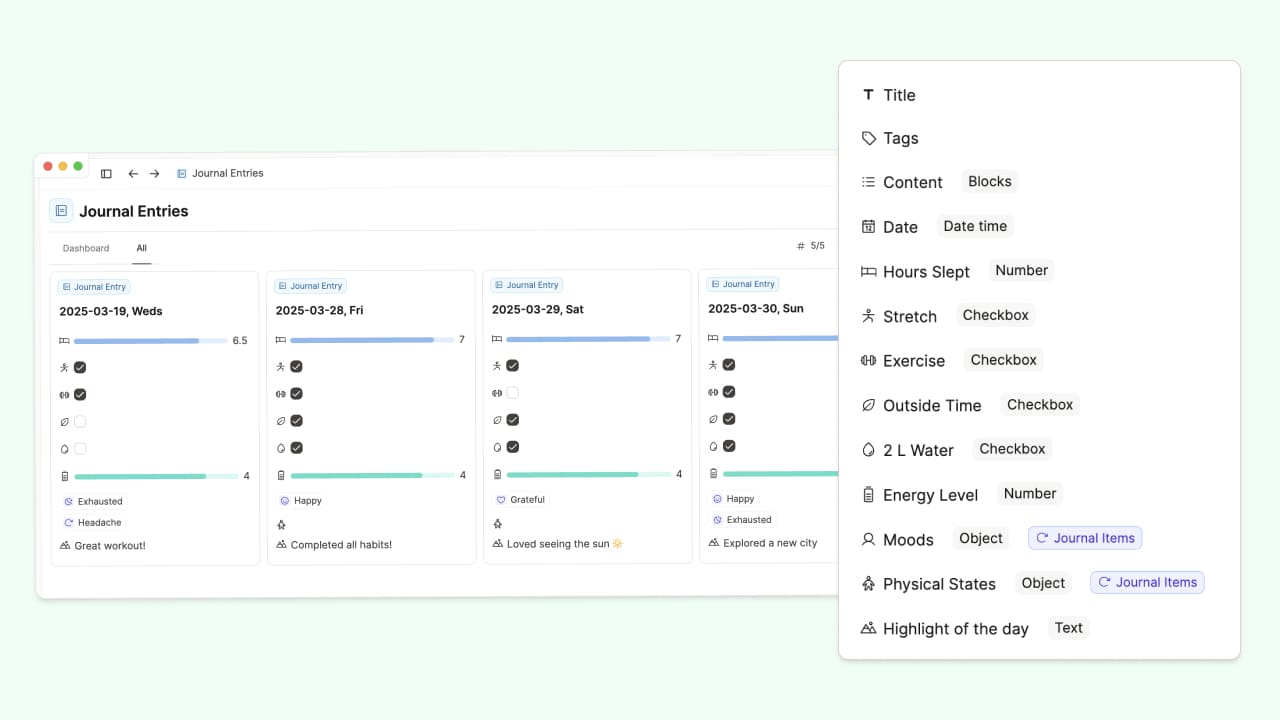
Create A Custom Journal Object Type
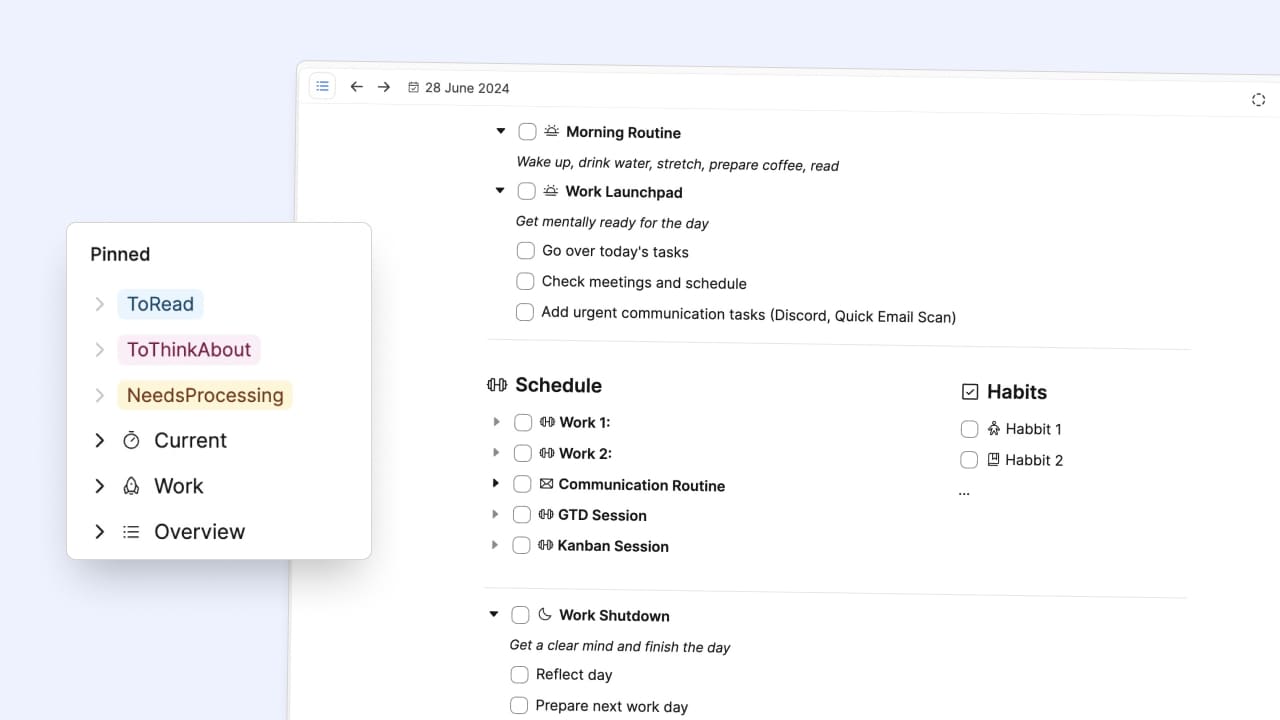
My simple but effective inbox and daily routines system

Steffen Bleher
How I use daily notes in Capacities

Michael von Hohnhorst