Part Two: How To Actually Take Class Notes

This is Part 2 of the Class Notes series, where I am explaining how I take notes for university.
ℹ️ Pre-requisites
- Make sure you’ve read part one! “How to setup class notes as a student in Capacities”
- Free Plan
- Familiar with the creation and use of objects, object types, properties, collections, and templates
- Familiar with (inline) linking
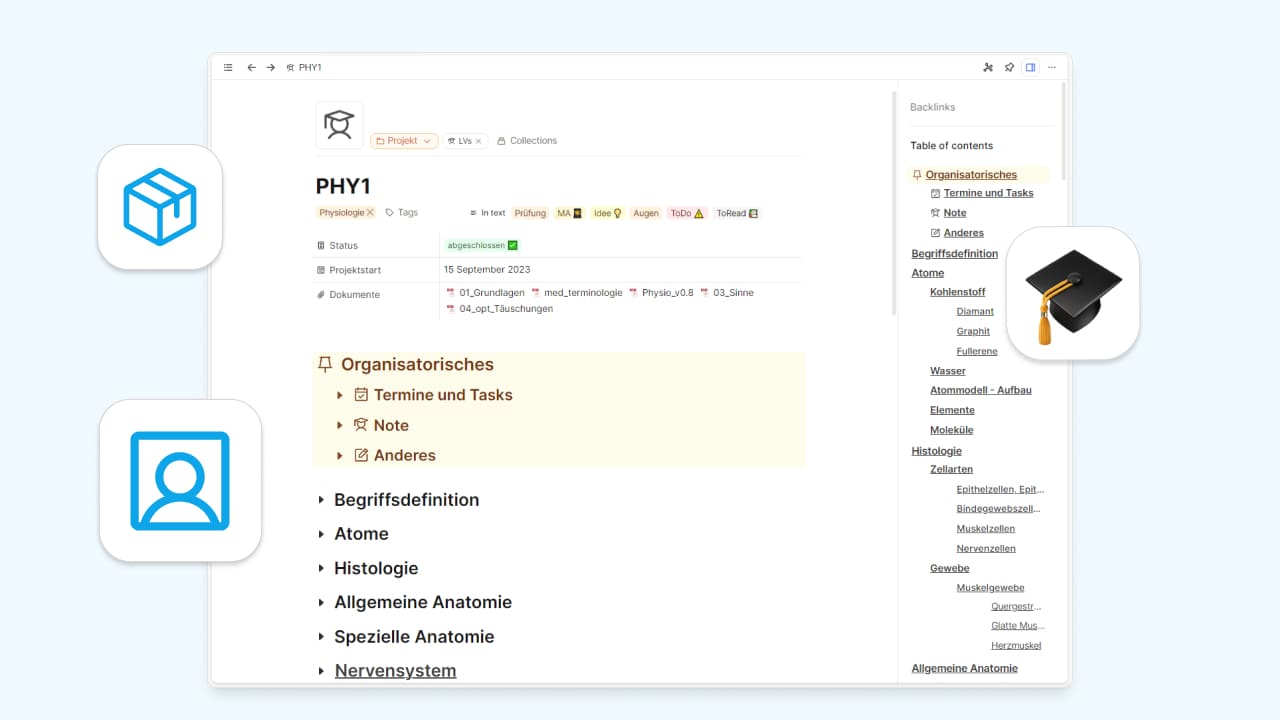
As you may recall from the first part of this series, I proposed organizing class notes as individual projects.
At the start of each semester, I create a separate project for each class, apply a class-specific template, and add any available important information and documents. So far so good.
But what is the intended outcome? What’s the objective? As we agreed in the previous article, our goal is to create useful notes that will serve us well over time. The most crucial step towards achieving this is - taking notes 🙂.
There are different ways of note-taking but in my view, it’s essential not to overcomplicate the process while maximizing its benefits. So, I’ll provide some guidance and information from my tried and tested method, that might be helpful for you.
Preparing for Classes
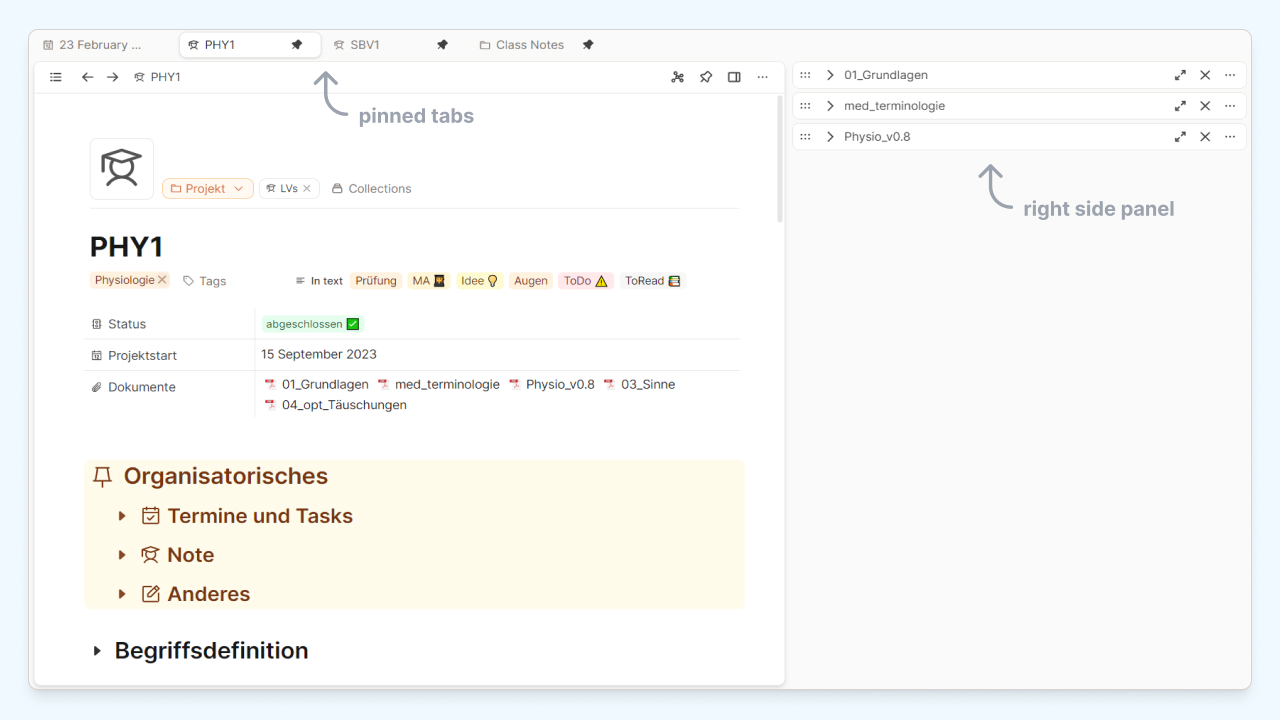
I open all of my active classes (or at least the ones I’ll attend first) in separate tabs and pin them for quick access.
On the first day of a class, I navigate to its pinned tab and open the most recent presentation or document I might need in the right side panel (Shift + click). I keep it open until it’s needed. For example, i might take screenshots and incorporate them into my notes.
In the body of the note, beneath the administrative section, I link to the current day (/today)and today’s presentation. This allows me to quickly review what I covered that day when I revisit my notes in the future and begin writing.
My Approach to Notes
Note-taking is a highly personal process, and it needs to be tailored to your individual needs. However, there are certain strategies that can make your note-taking more structured, effective, and beneficial.
Capacities offers a great writing experience for long form writing. It also provides outlining functionalities such as indenting information under key points using headers, toggles, and bullet points. This allows you to easily organize your notes, ensuring they are logically arranged and easily navigable.
Taking notes for classes is an excellent opportunity to fully utilize the benefits of an outlining style. Start your notes immediately with bullet points; this will naturally lead to an outline structure with its inherent advantages. 🤓
- Indent information beneath its parent block
- Information that delves deeper into a topic is nested as a child block under its parent block or heading (press tab).
- Indenting tells Capacities —> what comes now belongs to what is above! Put differently, the following content is related to the preceding content.
- Use bullet points and toggles
- I recommend using bullet points for every new block. Use toggles as soon as a lot of information is added under a parent block. A lot of content is written over the course of a semester, and without toggles, it can quickly become overwhelming.
- This also makes it easier to maintain focus if not all content is visible at once.
- Use headings additionally for larger topics
Maximizing the Benefits of Your Backlinks Through Indenting
As I’ve mentioned before, my class notes rely heavily on an outlining style, where you indent information under its parent. This is crucial for logically and visually grouping and arranging information, thereby structuring your notes.
It becomes particularly important and very powerful when you link (inline) to words or concepts because the backlinks section will provide the necessary context for these concepts for you to work with later.
If you intend to work with your notes and retrieve information in the future (for instance, for exams), proper indentation turns the backlink section into a powerful resource. Backlinking allows you to aggregate information in a completely new way without any extra effort. Indenting related information under its parent block ensures that important context is included.
💡 Tip
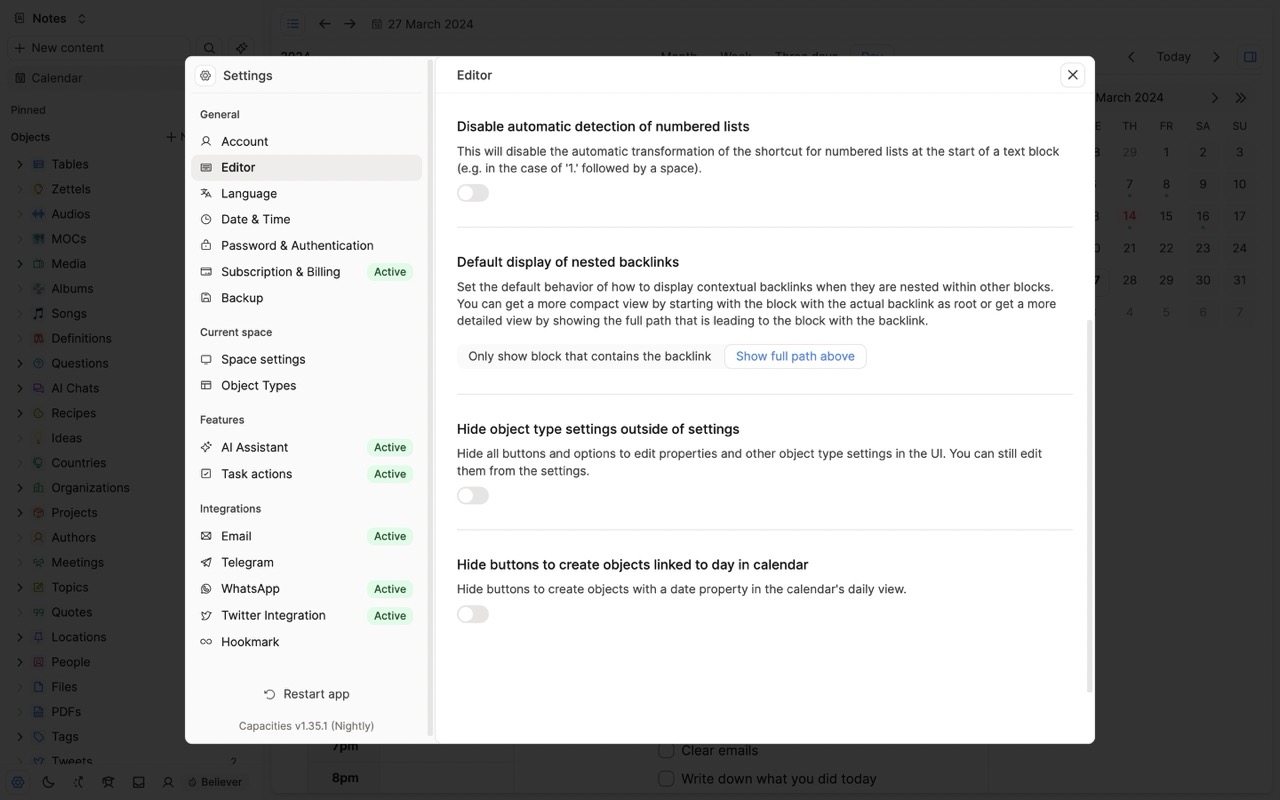
Navigate to the “Editor” in the settings. Here, you can select whether you want to see only the block that contains the backlink or its parent as well. I opt to “Show full path above” as it’s quite beneficial, particularly in the context of class notes and preparing for exams.
An example of the benefits of indenting
Let’s illustrate this with an example.
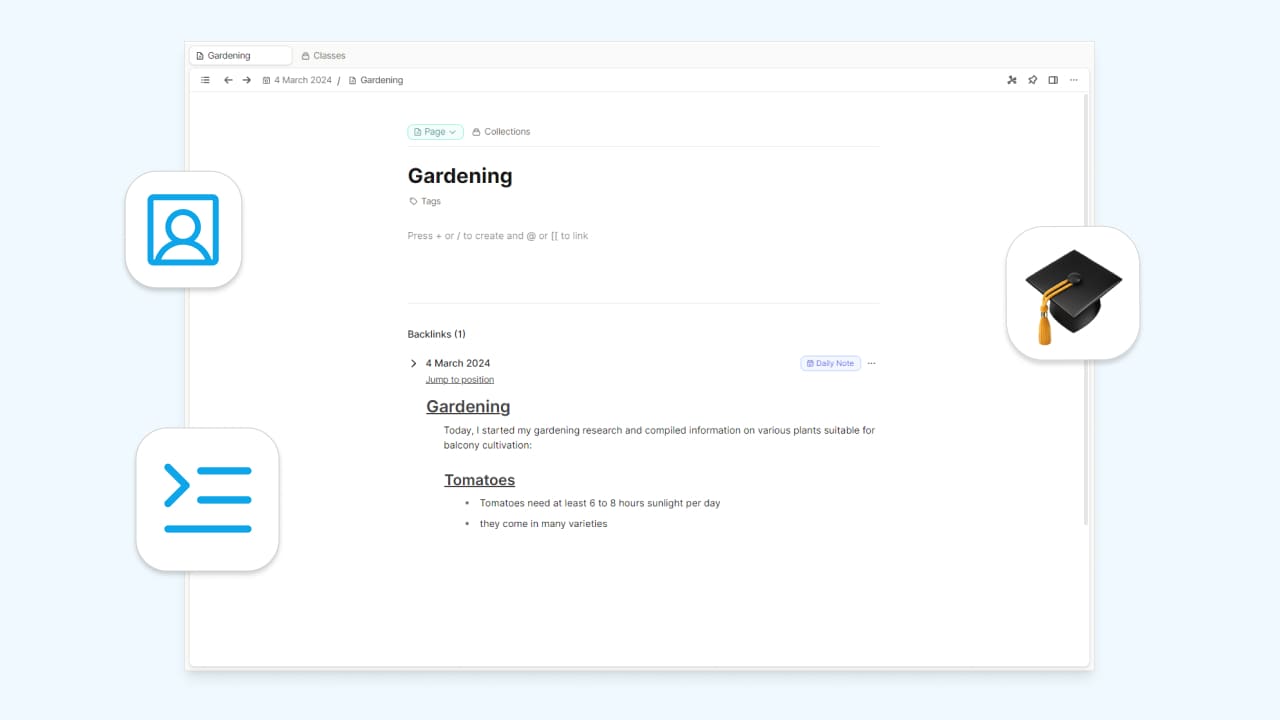
Suppose I want to write about gardening on the daily notes page because I plan to grow some tomatoes on my balcony, and I’ve done some research. “Gardening” is the main heading (Heading 1) and “Tomatoes” is a subheading (Heading 2). They are links to the pages “Gardening” and “Tomatoes”. In the first image, there is no indentation that signals to Capacities “the following content is related to the preceding content”.
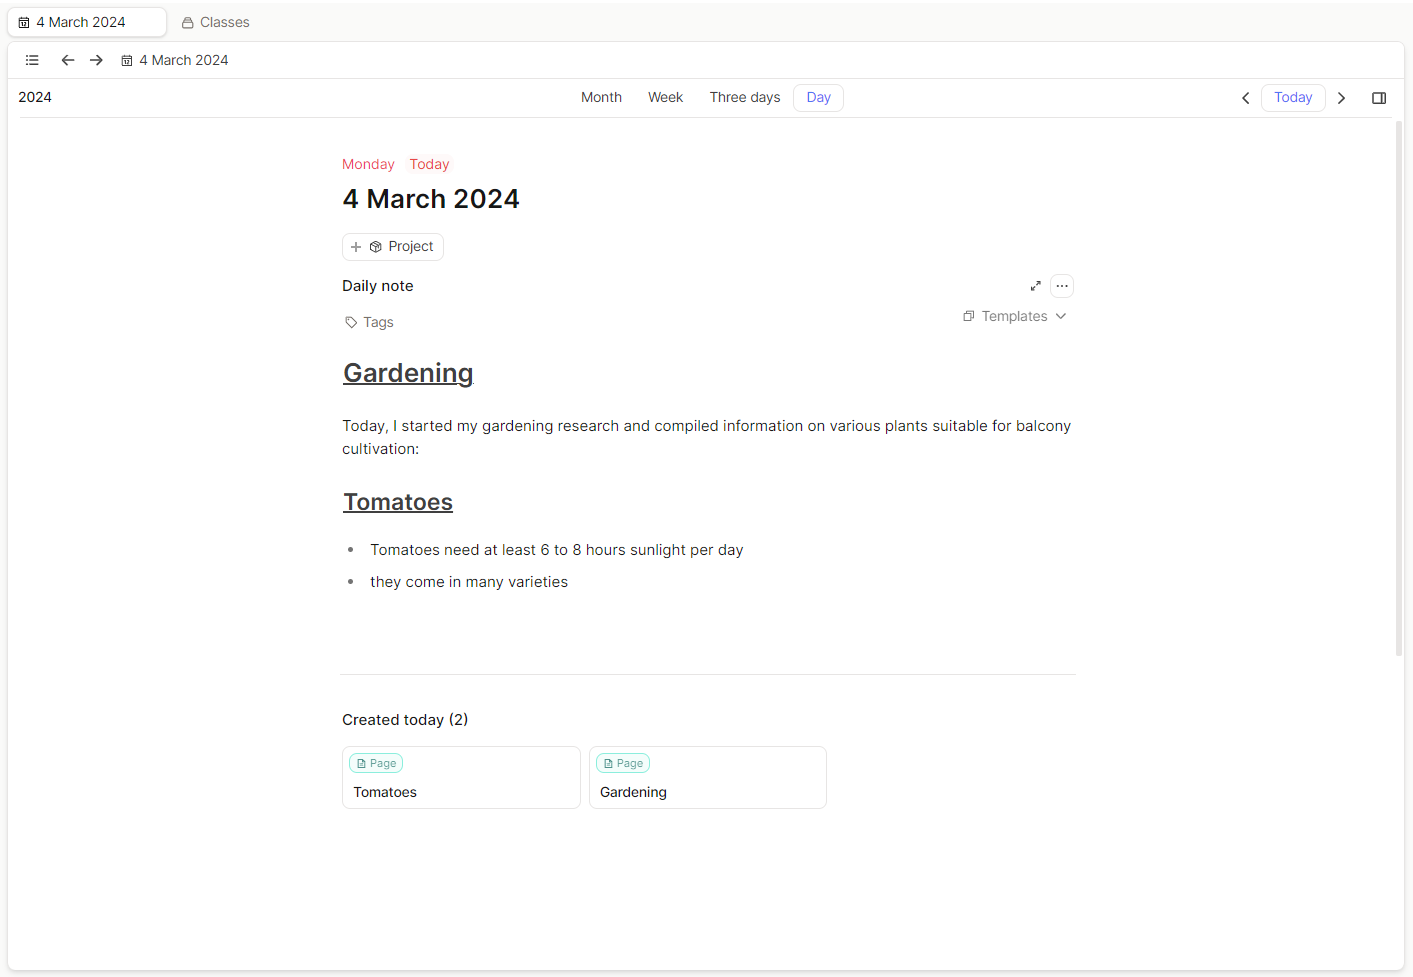
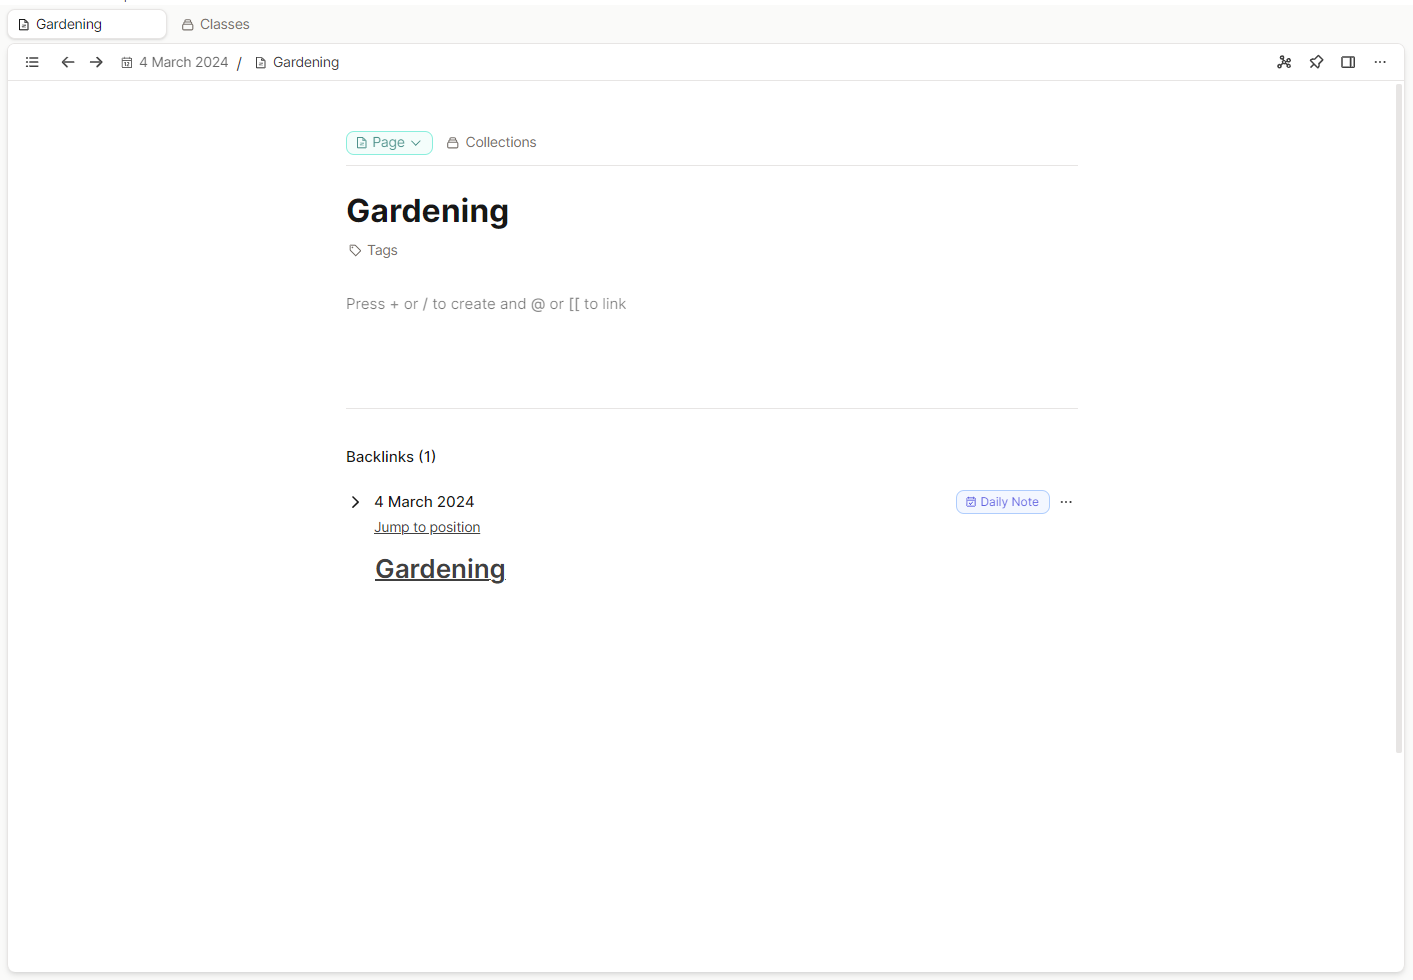
When we visit the Gardening page and examine the backlinks section, we find a link from the daily notes page, but that’s about it. The same goes for the “Tomatoes” page. The backlinks section offers little useful information for us in this context:
Now, let’s introduce some indentation.
In our second attempt, we ensure that every child block is indented under its parent block. Information about tomatoes is indented under “Tomatoes”, and everything is indented under “Gardening”.
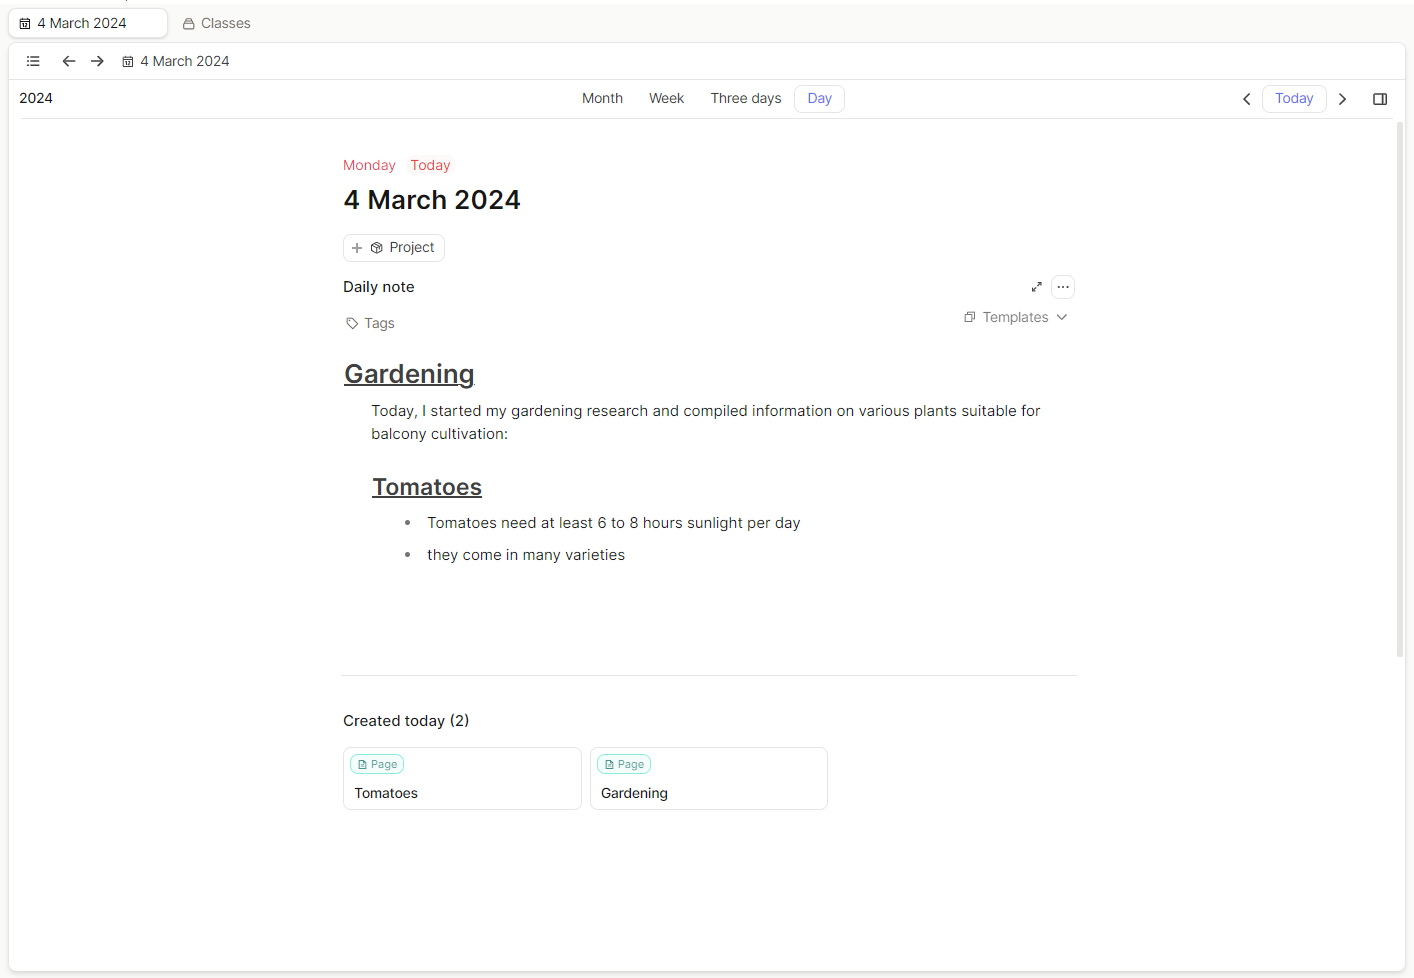
Revisiting the “Gardening” page and examining the backlinks section, we now see a link from the daily notes page AND all the information nested underneath.
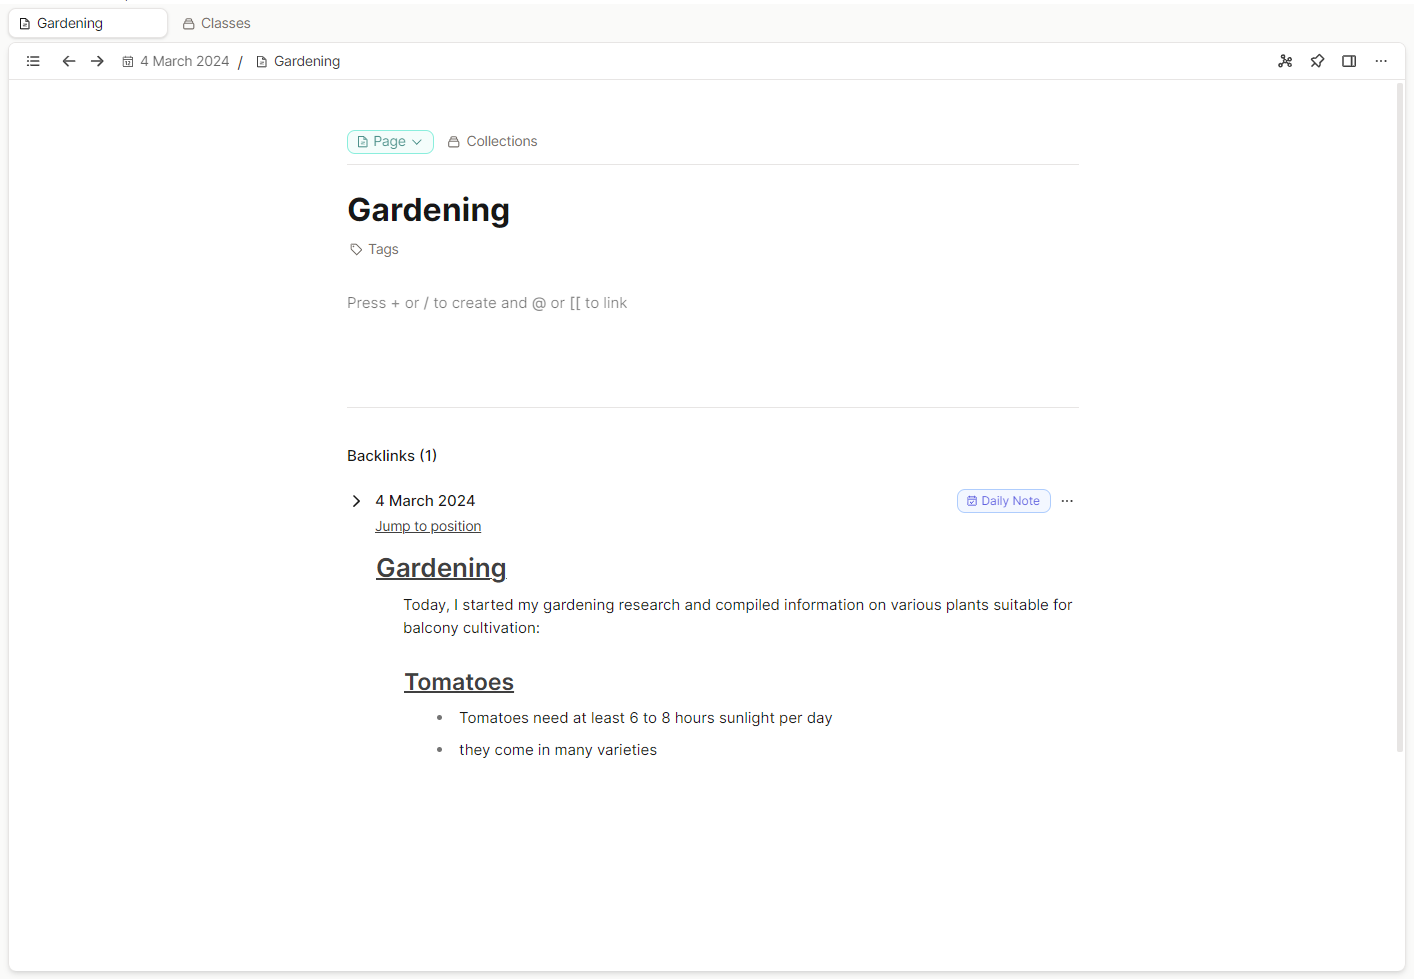
The same applies to the “Tomatoes” page. We can see everything written about tomatoes and the context in which tomatoes were mentioned (context: Gardening). Now, this is useful.

Imagine having several daily notes where you mention “Tomatoes”. The backlinks section becomes a powerful resource, automatically aggregating useful information without any additional work!
What this means for our Class Notes
- Don’t fret about making everything look perfect or forming complete, well-structured sentences.
- The priority for now is to take notes during class and ensure that you indent information where it makes sense and is necessary.
- If there are a lot of child blocks under a parent, use toggles to create sections.
- Remember: Indenting signals to Capacities —> the following content is related to the preceding content!
- So: Indent, indent, indent, and everything else can wait.
- If you have time during class, create new objects for new concepts and link them.
- For example, if “Hypothalamus” is mentioned, I create a new object and link to it. Any information related to this concept that comes afterward is indented underneath.
- It’s also fine if the words you link remain “empty,” meaning there’s nothing on the actual pages. That will change later 😊 and you can also add the toggles later.
- At the end of the day, you can quickly review your notes.
- Create headings where it makes sense.
- Create links when you find a word that seems important to the topic.
Aside from bullet points and indenting, I don’t pay much attention to formatting during the actual process of note-taking during a class. In my experience, there’s no time for formatting or adding headings, colors, or links. But I try to add them as soon as possible afterwards. Headings (and colors) are not absolutely necessary but provide further structure and orientation for the eye.
In part 3…
Next time, we breathe life into all those new, linked, and (for now) mostly empty pages. This is the process that helps me learn for exams and condense everything I’ve written into long-term (or evergreen, as they are called sometimes) notes. Until then, enjoy taking your notes, and see you next time!
Anna
